Home
Recipes
Italian
Gluten-Free
Vegetarian
Cheese/Dairy
Poultry
Meat
Seafood
Salad/Sides
Condiments
Snacks/Picnic
Breads
Pastry/Tarts
Ice Creams/Pops
Cakes/Cookies
Sweets/Desserts
Drinks
Videos
About
Measurements
Portfolio
Contact
Archives for September 2012
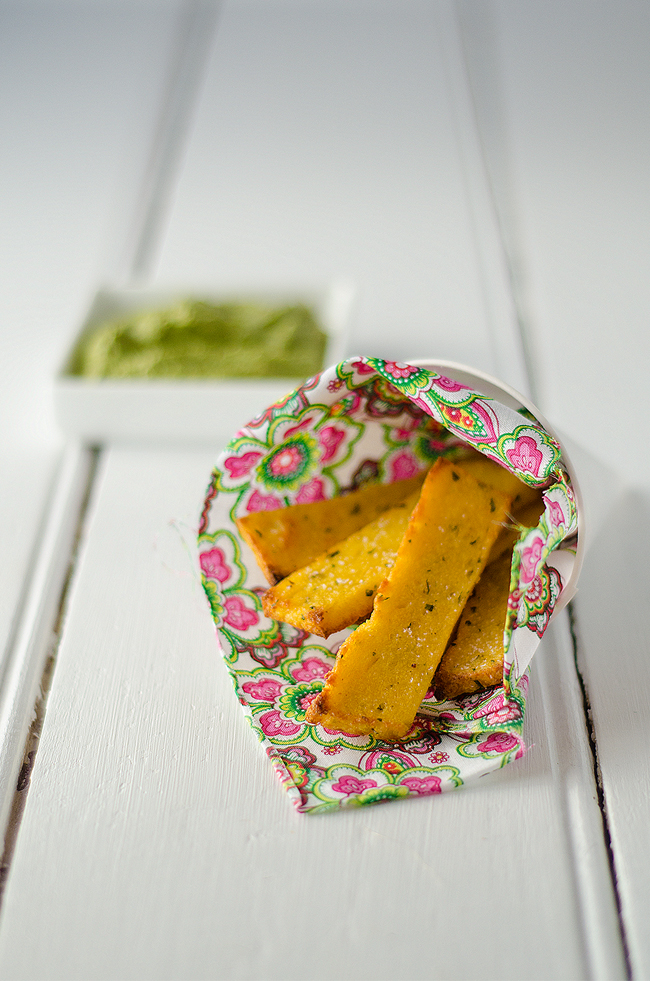
Baked Polenta Chips with Chilli Salsa Verde
29th Sep 2012
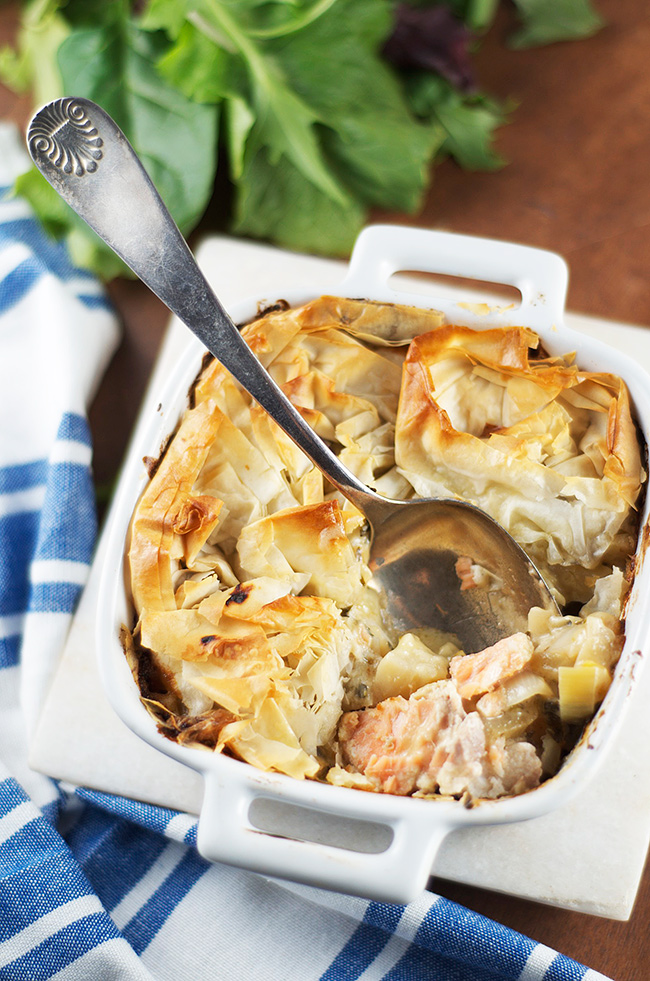
Fish and Fennel Pie
23rd Sep 2012
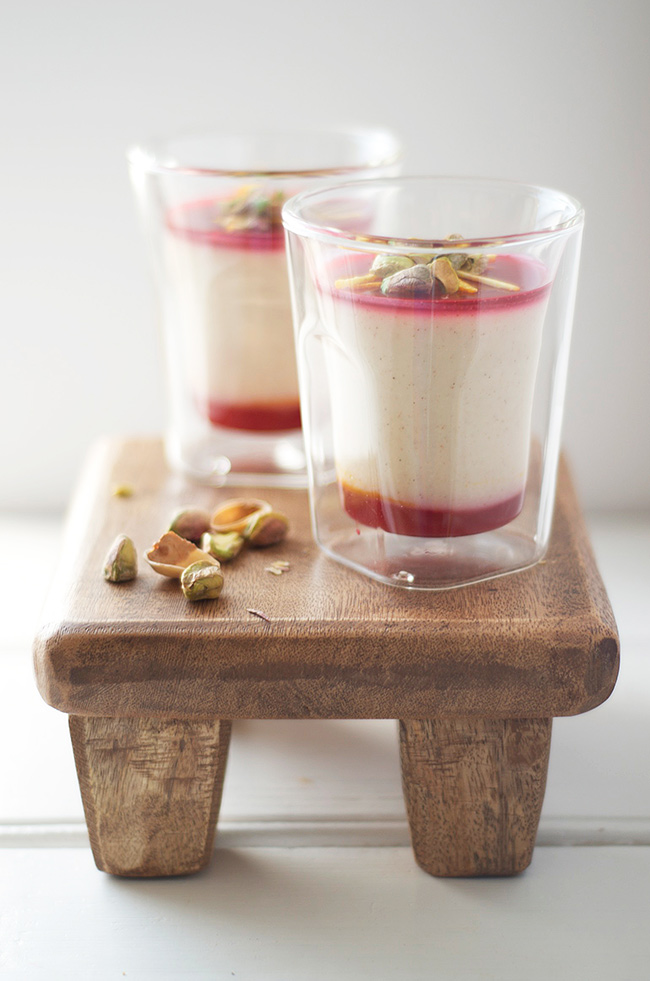
Chai Panna Cotta with Blood Orange Jelly
16th Sep 2012
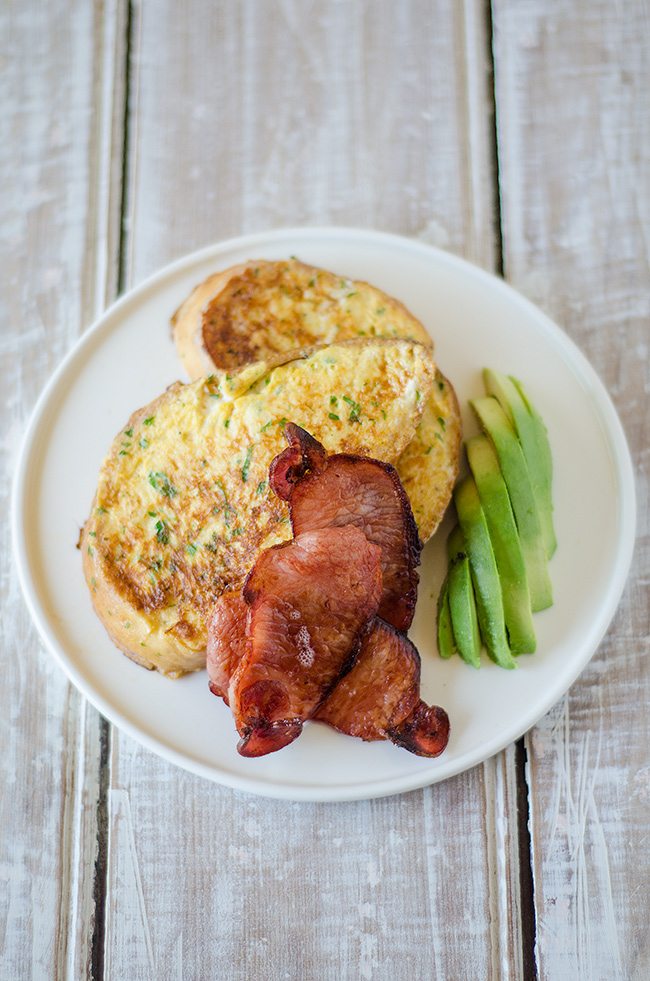
Savoury French Toast
13th Sep 2012
Chocolate Covered Oreos
9th Sep 2012
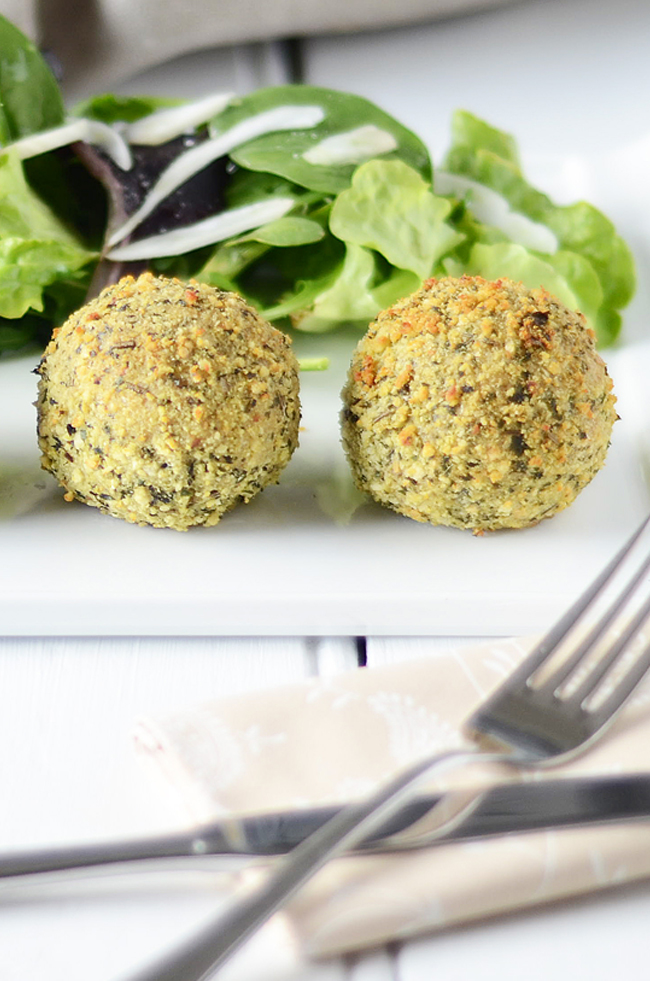
Baked Mushroom Arancini (Risotto Balls)
6th Sep 2012
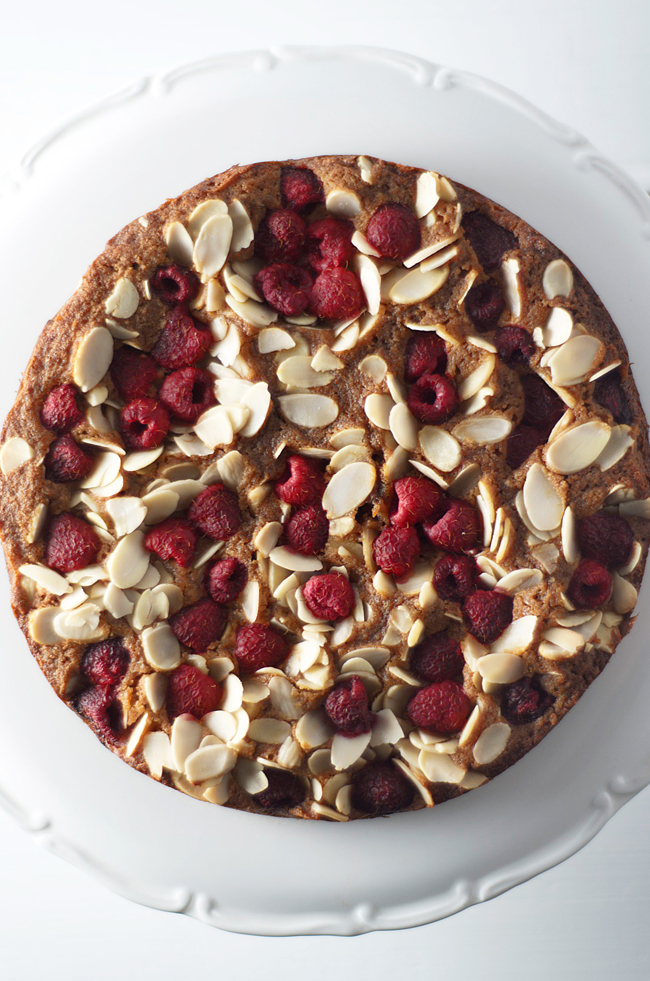
Gluten Free Raspberry Ricotta Cake
1st Sep 2012
back to top
Pin It on Pinterest
A LITTLE CHEW STRAIGHT TO YOU!
New recipes delivered fresh to your inbox